Email Template
Set up Email API
Currently, our system is configured to utilize the SendGrid API. We are planning to integrate additional APIs in the future to expand functionality. If you require an API, you can obtain one from the following link: SendGrid API.
Settings Menu
To add the SendGrid API, go to the Settings Menu. Click 'Settings' on the left side of the portal, and scroll to the last setting labeled 'Email' an input box will appear. Enter your SendGrid API and click submit. Once validated, Devii will display 'Email Templates Activated' and a new menu item Email Templates will be added to the left-side menu.

Create Email Template
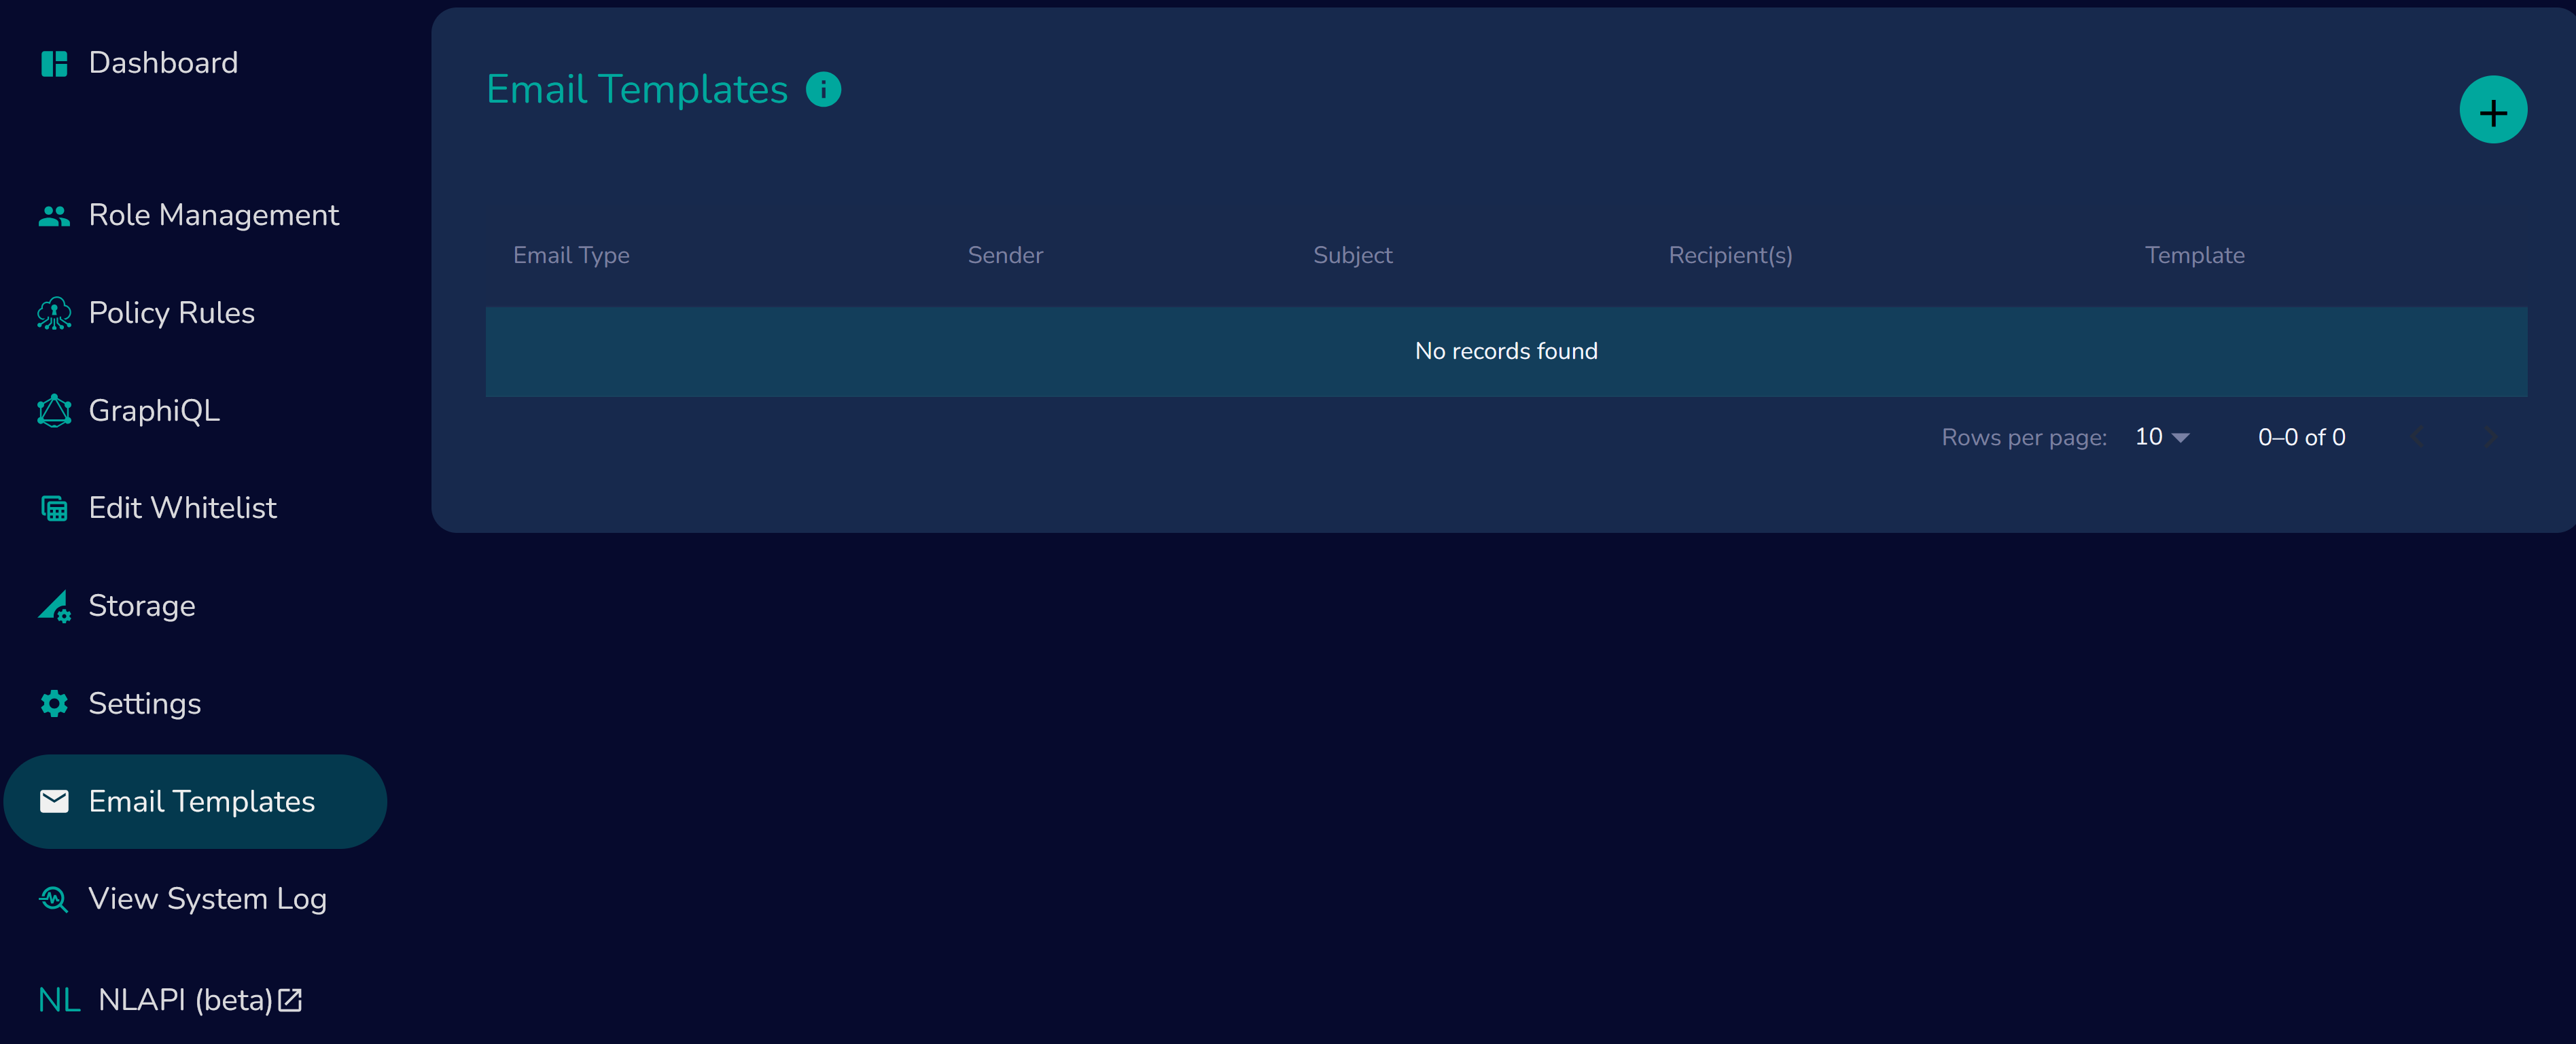
email_types { email_type } in GraphQL corresponds to 'Email Type' in the Email Template. If no email_type has been created yet, the Email Template will show 'No records found.' Once an email_type is created—either through GraphQL or directly in the Email Template—it will appear as an Email Type in the Email Template

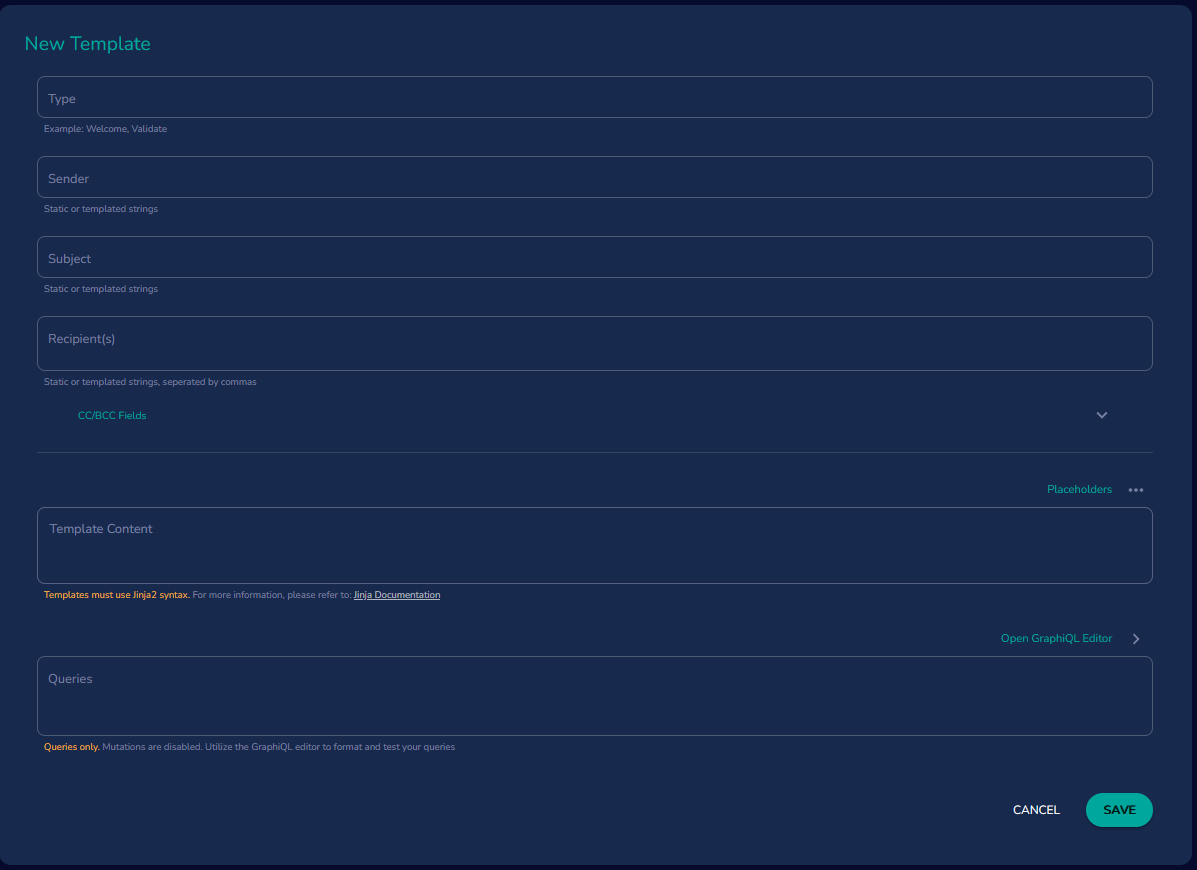
To create a new template, go to Email Templates in the left menu, click the + button in the upper right corner, and complete the New Template form.
Template Fields
The following fields are required:
-
Type: Symbolic name for the email type, it should consist of letters, numbers, and underscores for better compatibility (snake_case are preferred).
example: acct_setup -
Sender: Email address for the sender, optionally Jinja2-templated..
example: sender@email.com -
Subject: The subject line text. Template substitutions may include documented variables or functions.
example: Welcome to Devii -
Recipient(s): List of recipient email addresses, optionally Jinja2-templated.
example: recipient@email.com
CC/BCC Fields, Optional
Options for the emailer itself, may be a single entry or a list of values separated by commas.
-
cc: List of email addresses to be added to the CC recipients. May be Jinja2 templated.
-
bcc: List of email addresses to be added to the BCC recipients. May be Jinja2 templated.
Template Content
The template content is where you will add your HTML document written in Jinja2 syntax, allowing you to include placeholders for tables and fields from your database. This template will serve as the context for what you want your email to look like when sent. Above and to the right of the template content, there is a 'placeholders' helper where you can select your table and fields to insert into the template.
- Template: HTML document text written in Jinja2 syntax.
example:<html><body><h1>Welcome,</h1><p>thank you for registering.</p></body></html>
Queries, Optional
These fields define a GraphQL query for retrieving additional information for the email template. You can use the GraphiQL Editor by clicking on the arrow, create and test your GraphQL query and add to your Email Template.
- query: Required GraphQL query text. Variables are specified as 'filter', 'ordering', 'limit', and 'offset' as described below.
- outvar: Required output variable for query results, accessible within the email template.
- filter: Optional filter expression, may be Jinja2-templated.
- ordering: Optional list of strings for query ordering.
- limit: Optional limit, as with any Devii GraphQL query.
- offset: Optional offset as with any Devii GraphQL query.

Record Variables
Devii provides functions to access newly added or removed records within a table, accessible as [records][new] and [records][old], respectively. These functions will work in conjunction with your email rule options andtarget.
Example Email Types
This example for an email sent to a new user who signs up for the Devii To-Do app (see Tutorial) and will be triggered by an email rule (see example below).
Email to New User
- Type: welcome_email
- Sender: sender@email.com
- Subject: Welcome to Our Service
- Recipients(s): ["{{records["new"]["email"]}}"]
- Template Content:
<html><body><h1>Welcome, {{records["new"]["name"]}}!</h1><p>Thank you for registering.</p></body></html>
Email to User When a New Item is added
- Type: new_item_added
- Sender: someone@example.com
- Subject: New Item Added
- Recipient(s): someoneelse@example.com
- CC: ccsomeone@example.com
- Template Content:
<html><head><title>List of Items</title></head><body><h1>Items List</h1>{% for list in outvar %}<h2>{{ list.listname }}</h2><ul>{% if list.item_collection %}{% for item in list.item_collection %}<li>{{ item.itemname }}</li>{% endfor %}{% else %}<p>No items available</p>{% endif %}</ul>{% endfor %}</body></html> - Queries: {"query": {list {listname item_collection {itemname}}} "filter": "", "limit": null, "offset": null, "ordering":[ "" ], "outvar": "outvar", }
If a query has been added to 'Queries,' the options for filter, limit, offset, ordering, and outvar will be automatically available. While filter, limit, and ordering are optional, outvar requires a variable that will be added to the template. As an example this variable is used in the template above as {% for list in outvar %} to extract values from the GraphQL query.
Email Rules
Email rules specify when an Email Type will be sent to recipients and/or included as cc or bcc. These rules must be created in GraphiQL, Postman or other GraphQL interface. A more in-depth explanation can be found in Create Email Rules
Example Email Rules
Trigger Email to New User
- name: "Testing email",
- email_type: "welcome_email",
- operations: ["insert"],
- targets: ["devii_users"]
Trigger Email When Item is Added
- name: "new_item_added_rule"
- email_type: "new_item_added"
- operations: ["insert"]
- targets: ["item"]